Create a metaobject definition
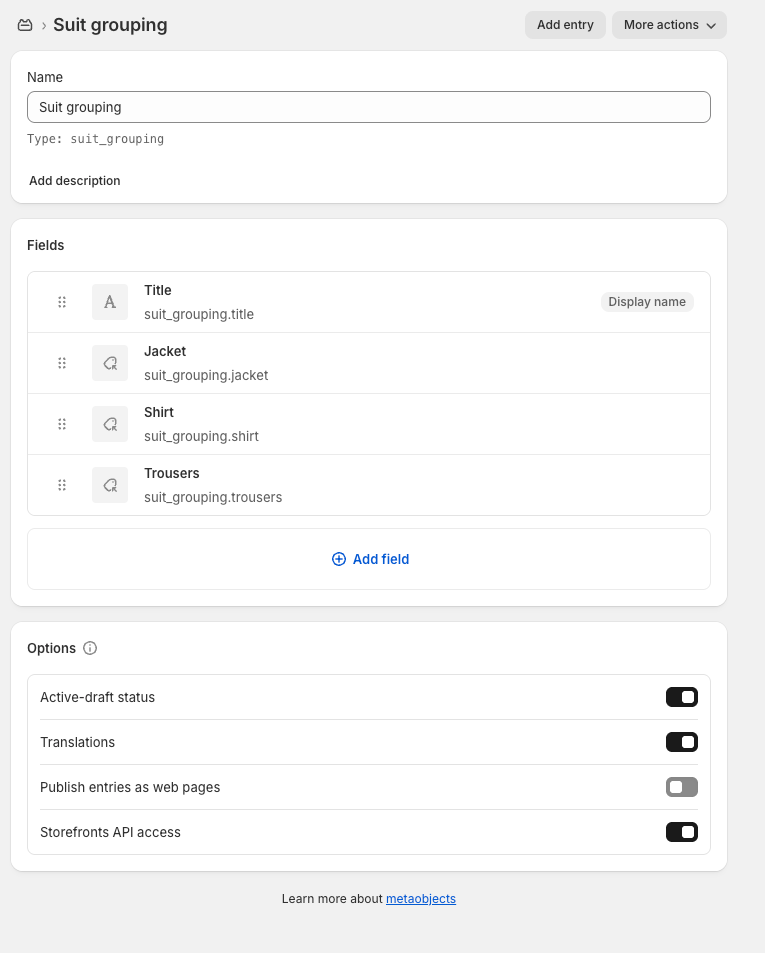
Create a metaobject with product fields for each sub-product.Example: a Suit metaobject with Jacket, Shirt, and Trousers fields.Metaobject definition with product fields
Add a product metafield
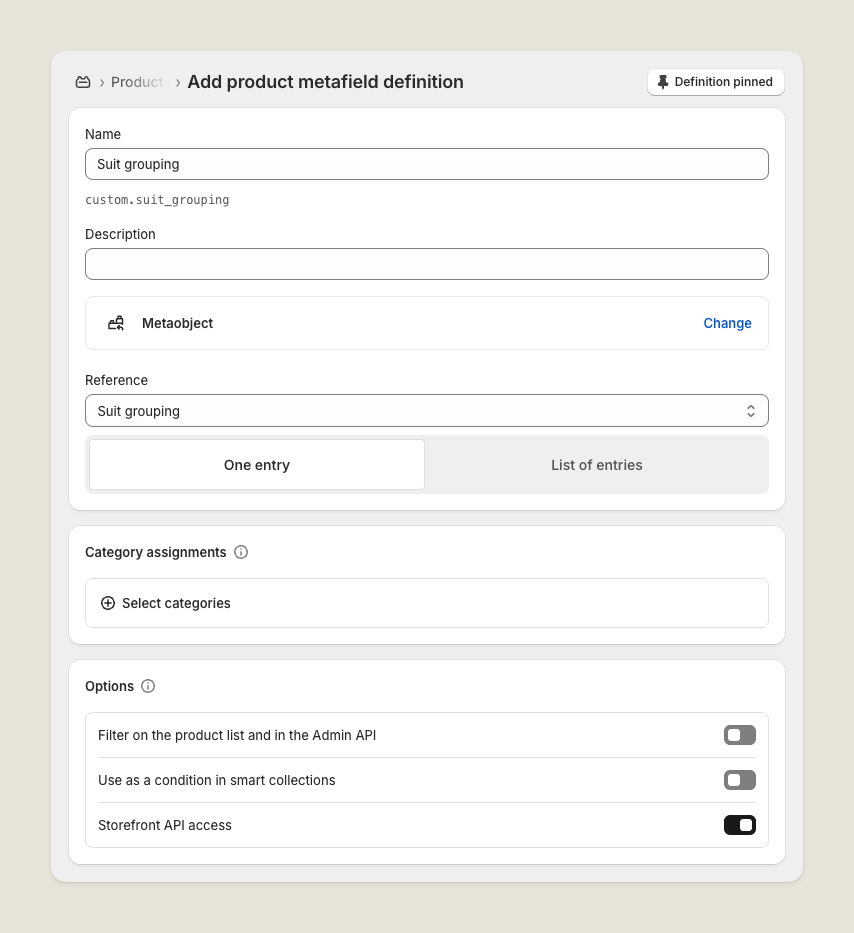
Create a product metafield that references your metaobject definition.Product metafield reference to grouping metaobject
Create grouping entries
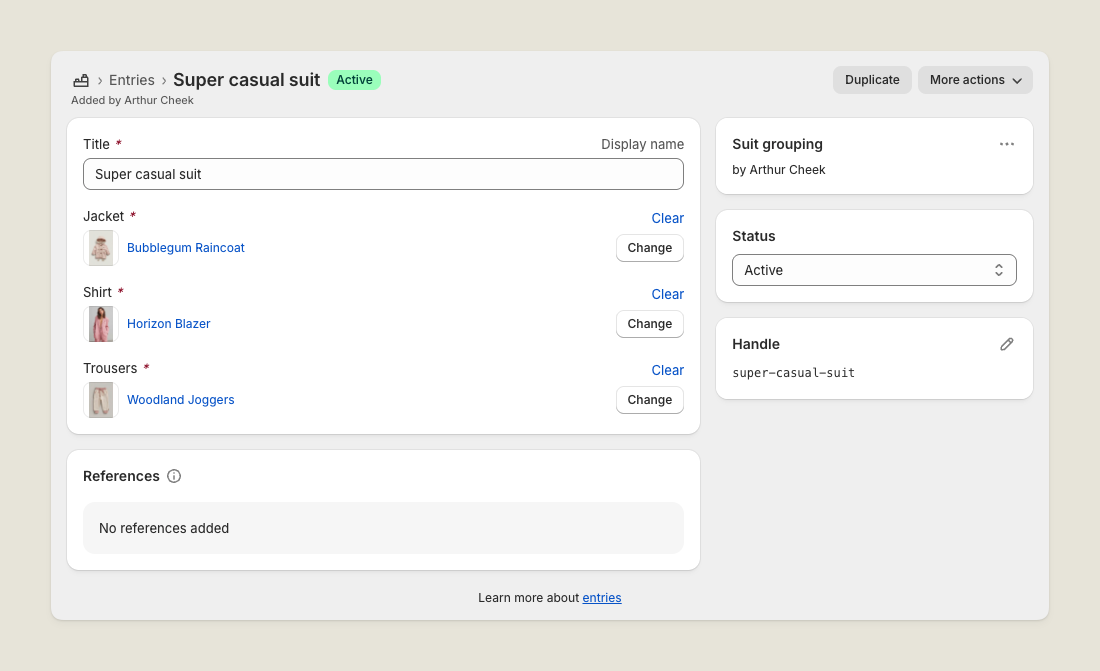
Add an entry for each variation, such as Slim Fit or Classic Fit.Grouping entries for bundle variations
Link parent products
Parent products must point to a grouping entry through the metafield so the correct sub-products are included at checkout.Linking a parent product to its bundle entry
Check availability
Bundles only work if all sub-products are available. Use Liquid to access bundle sub-products, then query the Product availability Storefront API to confirm stock.Learn more: Product availability API Add rental intents
Supercycle only recognizes products with a _rental_intent_token. Each sub-product in a bundle needs one.
- Create a rental intent with the Rental intent Storefront API.
- Add the token as a line item property.
Without this, sub-products won’t be processed as rentals.Learn more: Rental intent API
Check availability across bundle products
Before showing the Add to cart button, confirm that all sub-products in the bundle are available for the selected rental period.
Use the metaobject reference to fetch all linked sub-products, then post their IDs to the Product availability API.
{% assign bundle = product.metafields.bundle_grouping %}

<script>
  const subProductIds = [{{ bundle.hat.id }}, {{ bundle.top.id }}, {{ bundle.bottoms.id }}]
  const proxyPathPrefix = "/apps/supercycle"

  fetch(`${proxyPathPrefix}/product_availability_checks`, {
    method: "POST",
    body: JSON.stringify({
      productIds: subProductIds,
      rentalStart: "2025-01-01"
    })
  })
  .then(res => res.json())
  .then(data => console.log("Availability:", data))
  .catch(err => console.error("Error checking availability:", err));
</script>
Replace bundle_grouping with the metafield name you set in Step 4 above.
Generate rental intent tokens for sub-products
Each sub-product must have its own _rental_intent_token.
Use the rental_intents endpoint to generate one for each variant.
You can access each product’s available rental periods through its calendar_configuration metafield:
{{ bundle.hat_product.metafields.supercycle.calendar_configuration }}
{
  "rental_periods": [
    {
      "global_id": "gid://supercycle/CalendarRental::RentalPeriod/1",
      "name": "3 days"
    },
    {
      "global_id": "gid://supercycle/CalendarRental::RentalPeriod/2",
      "name": "4 days"
    }
  ],
  "fixed_fees": []
}
{% assign hat_options = bundle.hat_product.metafields.supercycle.calendar_configuration.rental_periods %}
{% assign hat_option = hat_options.first %}

<script>
  const selectedOptionID = "{{ hat_option.global_id }}"
  const proxyPathPrefix = "/apps/supercycle"

  fetch(`${proxyPathPrefix}/rental_intents`, {
    method: "POST",
    body: JSON.stringify({
      variantId: hat_variant.id,
      option: {
        globalId: selectedOptionID,
        rentalStart: "2025-01-01"
      }
    })
  })
  .then(res => res.json())
  .then(data => console.log("Rental intent token:", data))
  .catch(err => console.error("Error creating rental intent:", err));
</script>
Add all bundle variants to the cart
Once you’ve fetched rental intent tokens and confirmed availability, add all sub-product variants to the Shopify cart at once, either through a form or via AJAX.
<form action="/cart/add" method="post">
  <!-- Item 0: Hat -->
  <input type="hidden" name="items[0][id]" value="12345678901">
  <input type="hidden" name="items[0][quantity]" value="1">
  <input type="hidden" name="items[0][selling_plan]" value="98765">
  <input type="hidden" name="items[0][properties][_rental_intent_token]" value="<token_1>">

  <!-- Item 1: Top -->
  <input type="hidden" name="items[1][id]" value="12345678902">
  <input type="hidden" name="items[1][quantity]" value="1">
  <input type="hidden" name="items[1][selling_plan]" value="98765">
  <input type="hidden" name="items[1][properties][_rental_intent_token]" value="<token_2>">

  <!-- Item 2: Bottoms -->
  <input type="hidden" name="items[2][id]" value="12345678903">
  <input type="hidden" name="items[2][quantity]" value="1">
  <input type="hidden" name="items[2][selling_plan]" value="98765">
  <input type="hidden" name="items[2][properties][_rental_intent_token]" value="<token_3>">

  <button type="submit">Add bundle to cart</button>
</form>


